Hexo博客搭建汇总
搭建本博客已有一段时间了,今天就简单的汇总一下自从本博客搭建至今的点滴!
本站以下操作均是基于Windows 10 64位下进行操作的。
一、Hexo搭建
1.安装Node.js
Nodejs 官网 https://nodejs.org/
2.安装Git
Git官方网站 https://git-scm.com/downloads
3.安装并初始化Hexo
(1)新建一个文件夹,例如Blog
(2)进入新建的文件夹下,在空白处右击鼠标,选择Git Bash Here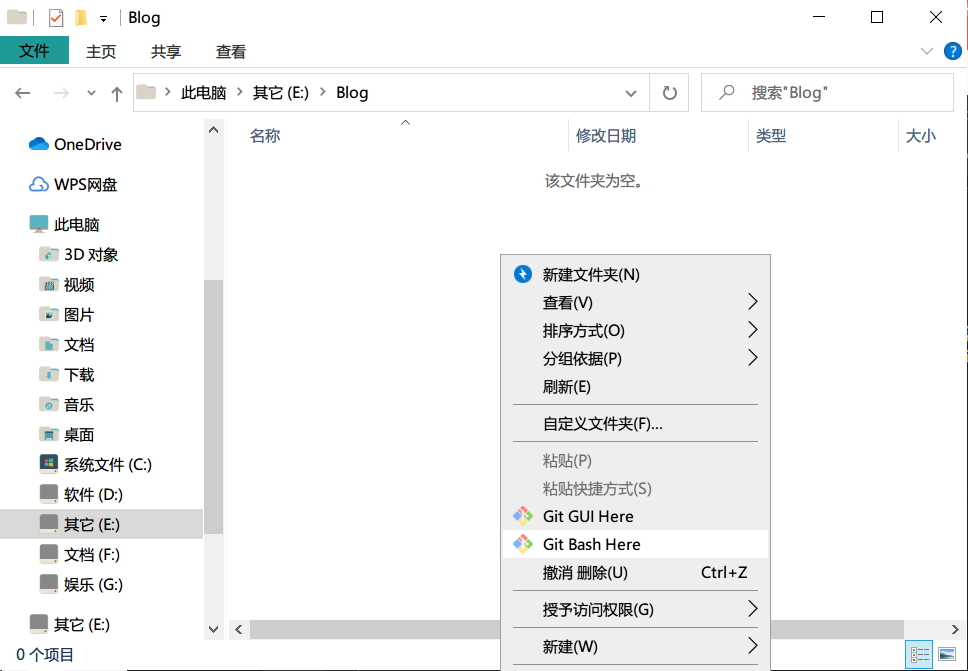
(3)使用node -v npm -v是否安装成功,没有成功的就重新安装node。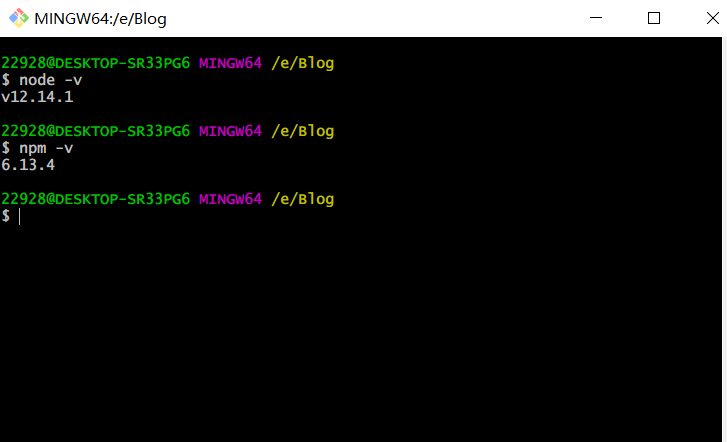
若需提升速度,终端输入
npm install -g cnpm --registry=https://registry.npm.taobao.org后续便可使用cnpm。
(4)安装Hexo
cnpm install -g hexo-cli或者
npm install -g hexo-cli(5)验证Hexo是否安装成功
hexo -v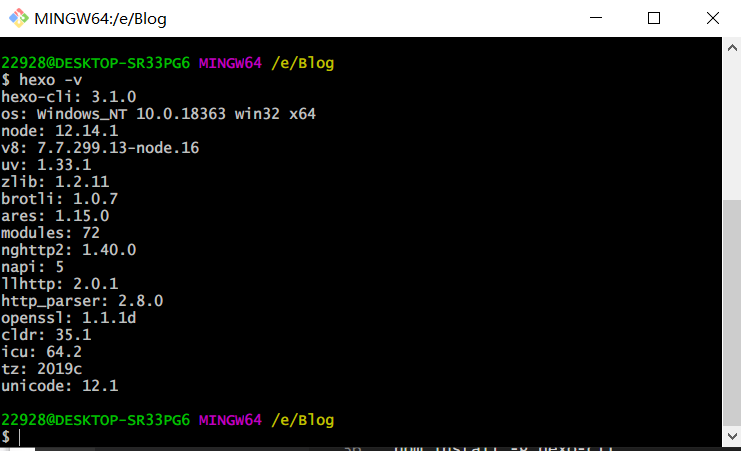
(6)初始化Hexo
hexo init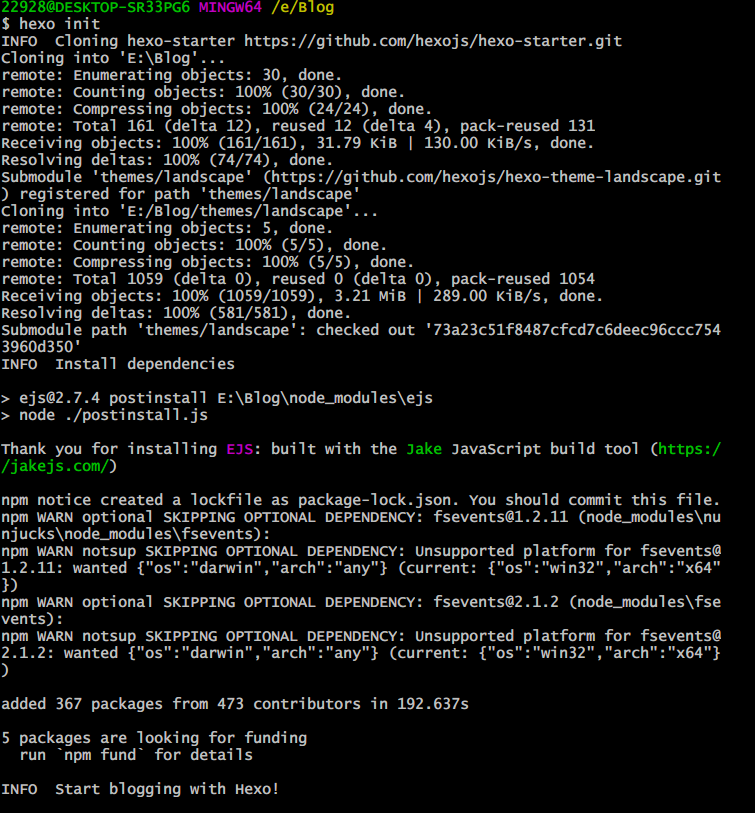
初始化完成后,打开刚才创建的文件夹,其中有一个_config.yml文件,后续统一称之为站点配置文件
# Hexo Configuration
## Docs: https://hexo.io/docs/configuration.html
## Source: https://github.com/hexojs/hexo/

# Site 站点主配置
title: Hexo  # 网站标题
subtitle:    # 网站副标题
description:   # 网站描述
keywords:      # 可以不填写保持默认
author: John Doe  # 网站拥有者昵称
language:    # 网站语言设置,一般根据依赖的主题而定
timezone:    # 网站时区设置,一般不填写保持默认

# URL地址链接设置
url: http://yoursite.com   # 网站url设置
root: /                    # 网站根目录链接
permalink: :year/:month/:day/:title/   # 文章链接,默认是按照 /年/月/日/文章标题 设置的链接
permalink_defaults:                    # 默认链接形式

# Directory  网站主要目录,这里一般不做改动
source_dir: source
public_dir: public
tag_dir: tags
archive_dir: archives
category_dir: categories
code_dir: downloads/code
i18n_dir: :lang
skip_render:

# Writing  网站文章设置,同样一般不做改动
new_post_name: :title.md  # File name of new posts
default_layout: post
titlecase: false # Transform title into titlecase
external_link: true # Open external links in new tab
filename_case: 0
render_drafts: false
post_asset_folder: false
relative_link: false
future: true
highlight:
  enable: true
  line_number: true
  auto_detect: false
  tab_replace:

# Home page setting  主页设置,一般不做改动
index_generator:
  path: ''
  per_page: 10
  order_by: -date  # 首页文章排序,默认是按照文章日期递减

# Category & Tag  分类设置,一般不做改动
default_category: uncategorized
category_map:
tag_map:

# Date / Time format  日期设置,一般不做改动
date_format: YYYY-MM-DD
time_format: HH:mm:ss

# Pagination  导航页设置,一般不做改动
per_page: 10   # 设置每页展示多少文章
pagination_dir: page

# Extensions  使用的主题名称,可以在这里切换
theme: next  # 此处切换主题名称

# Deployment  部署,一般选择部署到Github上
deploy:
  type:
4.运行测试
hexo clean #用来清理缓存文件
hexo g      #生成文件
hexo  s     #运行本地服务器
hexo d #上传到服务器打开浏览器,输入http://localhost:4000即可进行查看。
同一个局域网内,hexo s 后在手机浏览器打开 http://192.168.xxx.xxx:4000 就可以在手机上预览效果。xxx为你自己电脑在局域网内的ip。以上流程不太清楚的话,推荐哔哩哔哩UP主CodeSheep、GB隔壁老英的视频
5.视频教程推荐
手把手教你从0开始搭建自己的个人博客 |无坑版视频教程| hexo
6.GitHub创建个人仓库
首先,要有一个GitHub账户,没有的话注册一个。
注册完登录后,新建仓库,格式为username.github.io
例如 我的用户名为lskjwp那么 仓库名应为lskjwp.github.io
7.生成SSH添加到GitHub
(1)配置github账户信息
回到gitbash中,配置github账户信息。
这里的yourname输入你的GitHub用户名,youremail输入你GitHub的邮箱。
git config --global user.name "YourName"
git config --global user.email "YourEail"
(2)创建SSH
在gitbash中输入
ssh-keygen -t rsa -C "youremail" 生成ssh。
然后按给出的路径的方式找到id_rsa.pub文件,打开并复制其中的内容。
(3)添加密钥
进入上面新建的github仓库 点击右上角setting,找到Deploy keys,选择Add Deploy keys,Title随便填写、Key的内容为刚才复制的id_rsa.pub文件中的内容。
(4)验证
在gitbash中验证是否添加成功:
ssh -T git@github.com8.将hexo部署到GitHub
(1)打开hexo项目文件夹,修改_config.yml文件的一些配置(冒号之后都是有空格的)
deploy:
  type: git
  repo: https://github.com/YourgithubName/YourgithubName.github.io.git
  branch: master
YourgithubName就是你的GitHub账户
(2)安装deploy-git
npm install hexo-deployer-git --save(3)访问http://yourname.github.io
hexo clean
hexo generate
hexo deploy
hexo clean清除了你之前生成的东西;hexo generate顾名思义,生成静态文章,可以用hexo g缩写;hexo deploy部署文章,可以用hexo d缩写。
二、配置主题(Next为例)
1.挑选主题
选择你喜欢的Themes,里面有大量美观的主题。
推荐Next,本博客使用的主题NextMatery。
2.下载主题
下载主题有两种方式:
(1)通过git命令方式直接安装
1>进入hexo根目录下,GitBash
2>输入以下命令安装Next7.7.x
git clone https://github.com/theme-next/hexo-theme-next/ themes/next(2)直接把整个仓库下载到本地,再移动到站点目录Themes下
3.启用主题
打开站点配置文件_config.yml,找到theme字段,并将其值更改为next。
theme: next4.主题配置
(1)选择SchemeHexo根目录/themes/next/_config.xml,这个文件站点根目录下配置文件同名(Hexo根目录/_config.xml),但是这个配置文件是在主题目录下的,在本文统一称之为主题配置文件。
打开主题配置文件,搜索scheme关键字,看到有4行scheme的配置,将你需用启用的 scheme前面注释#去除即可。(不需要的用#注释掉)
# Schemes
#scheme: Muse
#scheme: Mist
scheme: Pisces
#scheme: Gemini
5.设置语言
编辑站点配置文件,将language设置成你所需要的语言。例如选用简体中文,配置如下:
language: zh-CN6.更换字体
将字体更换为Google Fonts思源宋体!
(1)修改字体
1>修改配置文件中的参数
修改主题配置文件_config.yml,找到font,根据实际情况稍作修改!文件位置:~/themes/next/_config.yml
font:
  # Use custom fonts families or not.
  # Depended options: `external` and `family`.
  enable: true

  # Uri of fonts host, e.g. //fonts.googleapis.com (Default).
  host: https://fonts.loli.net

  # Font options:
  # `external: true` will load this font family from `host` above.
  # `family: Times New Roman`. Without any quotes.
  # `size: x.x`. Use `em` as unit. Default: 1 (16px)

  # Global font settings used for all elements inside <body>.
  global:
    external: true
    family: Noto Serif SC
    size:

  # Font settings for site title (.site-title).
  title:
    external: true
    family:
    size:

  # Font settings for headlines (<h1> to <h6>).
  headings:
    external: true
    family: Noto Serif SC
    size:

  # Font settings for posts (.post-body).
  posts:
    external: true
    family: Noto Serif SC

  # Font settings for <code> and code blocks.
  codes:
    external: true
    family:
2>修改配置文件
找到主题的base.styl文件文件位置:~/themes/next/source/css/_variables/base.styl
$font-family-monospace    = consolas, Menlo, $font-family-chinese, monospace;
$font-family-monospace    = get_font_family('codes'), consolas, Menlo, $font-family-chinese, monospace if get_font_family('codes');
修改为
$font-family-monospace    = consolas, Menlo, $font-family-base, monospace
$font-family-monospace = get_font_family('codes'), consolas, Menlo, $font-family-base, monospace if get_font_family('codes')(2)设置字体大小文件位置:~/themes/next/source/css/_variables/base.styl
// Font size
$font-size-base           = 1em;
修改为
// Font size
$font-size-base           = 16px
7.设置头像
编辑主题配置文件,修改字段avatar
# Sidebar Avatar
avatar:
  # In theme directory (source/images): /images/avatar.gif
  # In site directory (source/uploads): /uploads/avatar.gif
  # You can also use other linking images.
  url: # 此处是头像的地址
  # If true, the avatar would be dispalyed in circle.
  rounded: true # 设置头像是否为圆形
  # If true, the avatar would be rotated with the cursor.
  rotated: false # 设置鼠标放到头像上是否旋转
  opacity: 1 # 设置不透明度,1为完全不透明,0为完全透明
8.文章开启阅读更多按钮
编辑主题配置文件,修改字段auto_excerpt
auto_excerpt:
  enable: true
  length: 150 #到多少字数后不显示
9.文章元数据设置
编辑主题配置文件,修改字段post_meta
post_meta:
  item_text: true  # 是否显示对应的文字
  created_at: true  # 是否显示 创建于
  updated_at:       # 是否显示 更新于
    enabled: false
    # 更新日期显示规则,只有更新日期与创建日期不同时,才会显示
    another_day: true
  categories: true # 是否显示分类信息
10.菜单栏设置
编辑主题配置文件,修改字段menu
menu:
  home: / || home
  #about: /about/ || user
  #tags: /tags/ || tags
  #categories: /categories/ || th
  archives: /archives/ || archive
  #schedule: /schedule/ || calendar
  #sitemap: /sitemap.xml || sitemap
  #commonweal: /404/ || heartbeat

# Enable/Disable menu icons.
menu_icons:
  enable: true  #表示是否显示菜单图标icons
  badges: false  # 显示每个菜单下面有多少个内容
其中||后面表示的 Fontawesome 中的图标名称,如果想要修改图标,可以去FontAwesome官网找自己喜欢的图标样式。
11.关闭底部hexo强力驱动和Theme - NexT.scheme
编辑主题配置文件,修改字段powered和theme
  powered:
    # Hexo link (Powered by Hexo).
    enable: false
    # Version info of Hexo after Hexo link (vX.X.X).
    version: true

  theme:
    # Theme & scheme info link (Theme - NexT.scheme).
    enable: false
    # Version info of NexT after scheme info (vX.X.X).
version: true将enable:值设置为false即可!
12.网站favicon图标设置
编辑主题配置文件,修改字段favicon
favicon:
  small: /images/favicon-16x16-next.png  # 网站小图标
  medium: /images/favicon-32x32-next.png   # 中等图标
  apple_touch_icon: /images/apple-touch-icon-next.png  # app_touch上显示图标
  safari_pinned_tab: /images/logo.svg   # 在Safari浏览器中显示图标
  #android_manifest: /images/manifest.json  # 安卓默认显示同普通情况下
#ms_browserconfig: /images/browserconfig.xml网站favicon图标可以放到你的next主题目录下面的source/images中,然后按照上述相对路径方式引用,这里favicon图标的格式随便,可以是 png 或其它图片格式。
13.添加友链
编辑主题配置文件,修改字段links_icon
links_icon: link
links_title: 友情链接
links_layout: inline
links:
  yearito: http://yearito.cn/
显示样式设置解释:
links_layout: block         # 一行显示一个链接
links_layout: inline         #紧凑显示链接
14.添加社交链接
编辑主题配置文件,修改字段social
social:
  GitHub: https://github.com/yourname || github
  E-Mail: mailto:yourname@gmail.com || envelope
  Weibo: https://weibo.com/yourname || weibo
  Google: https://plus.google.com/yourname || google
  #Twitter: https://twitter.com/yourname || twitter
  #FB Page: https://www.facebook.com/yourname || facebook
  #VK Group: https://vk.com/yourname || vk
  #StackOverflow: https://stackoverflow.com/yourname || stack-overflow
  #YouTube: https://youtube.com/yourname || youtube
  #Instagram: https://instagram.com/yourname || instagram
  #Skype: skype:yourname?call|chat || skype

social_icons:
  enable: true  # 显示社交软件图标
  icons_only: false  # 显示图标的同时显示文字
三、美化主题
1.添加结束标记
(1)新建文件 post-end-tag.swig
添加如下代码:
文件位置themes\next\layout\_macro\post-end-tag.swig
<div>
  {% if not is_index %}

      -------- 本文结束

       感谢阅读 --------

  {% endif %}
</div>
(2)在文章布局模板中添加如下代码
文件位置themes\next\layout\_macro\post.swig
在
处(上下皆可),添加如下代码:
<div>
    {% if not is_index %}
    {% include 'passage-end-tag.swig' %}
    {% endif %}
</div>
2.鼠标点击(礼花)特效
(1)添加fireworks.js文件
礼花特效代码:
class Circle {
  constructor({ origin, speed, color, angle, context }) {
    this.origin = origin
    this.position = { ...this.origin }
    this.color = color
    this.speed = speed
    this.angle = angle
    this.context = context
    this.renderCount = 0
  }

  draw() {
    this.context.fillStyle = this.color
    this.context.beginPath()
    this.context.arc(this.position.x, this.position.y, 2, 0, Math.PI * 2)
    this.context.fill()
  }

  move() {
    this.position.x = (Math.sin(this.angle) * this.speed) + this.position.x
    this.position.y = (Math.cos(this.angle) * this.speed) + this.position.y + (this.renderCount * 0.3)
    this.renderCount++
  }
}

class Boom {
  constructor ({ origin, context, circleCount = 16, area }) {
    this.origin = origin
    this.context = context
    this.circleCount = circleCount
    this.area = area
    this.stop = false
    this.circles = []
  }

  randomArray(range) {
    const length = range.length
    const randomIndex = Math.floor(length * Math.random())
    return range[randomIndex]
  }

  randomColor() {
    const range = ['8', '9', 'A', 'B', 'C', 'D', 'E', 'F']
    return '#' + this.randomArray(range) + this.randomArray(range) + this.randomArray(range) + this.randomArray(range) + this.randomArray(range) + this.randomArray(range)
  }

  randomRange(start, end) {
    return (end - start) * Math.random() + start
  }

  init() {
    for(let i = 0; i < this.circleCount; i++) {
      const circle = new Circle({
        context: this.context,
        origin: this.origin,
        color: this.randomColor(),
        angle: this.randomRange(Math.PI - 1, Math.PI + 1),
        speed: this.randomRange(1, 6)
      })
      this.circles.push(circle)
    }
  }

  move() {
    this.circles.forEach((circle, index) => {
      if (circle.position.x > this.area.width || circle.position.y > this.area.height) {
        return this.circles.splice(index, 1)
      }
      circle.move()
    })
    if (this.circles.length == 0) {
      this.stop = true
    }
  }

  draw() {
    this.circles.forEach(circle => circle.draw())
  }
}

class CursorSpecialEffects {
  constructor() {
    this.computerCanvas = document.createElement('canvas')
    this.renderCanvas = document.createElement('canvas')

    this.computerContext = this.computerCanvas.getContext('2d')
    this.renderContext = this.renderCanvas.getContext('2d')

    this.globalWidth = window.innerWidth
    this.globalHeight = window.innerHeight

    this.booms = []
    this.running = false
  }

  handleMouseDown(e) {
    const boom = new Boom({
      origin: { x: e.clientX, y: e.clientY },
      context: this.computerContext,
      area: {
        width: this.globalWidth,
        height: this.globalHeight
      }
    })
    boom.init()
    this.booms.push(boom)
    this.running || this.run()
  }

  handlePageHide() {
    this.booms = []
    this.running = false
  }

  init() {
    const style = this.renderCanvas.style
    style.position = 'fixed'
    style.top = style.left = 0
    style.zIndex = '999999999999999999999999999999999999999999'
    style.pointerEvents = 'none'

    style.width = this.renderCanvas.width = this.computerCanvas.width = this.globalWidth
    style.height = this.renderCanvas.height = this.computerCanvas.height = this.globalHeight

    document.body.append(this.renderCanvas)

    window.addEventListener('mousedown', this.handleMouseDown.bind(this))
    window.addEventListener('pagehide', this.handlePageHide.bind(this))
  }

  run() {
    this.running = true
    if (this.booms.length == 0) {
      return this.running = false
    }

    requestAnimationFrame(this.run.bind(this))

    this.computerContext.clearRect(0, 0, this.globalWidth, this.globalHeight)
    this.renderContext.clearRect(0, 0, this.globalWidth, this.globalHeight)

    this.booms.forEach((boom, index) => {
      if (boom.stop) {
        return this.booms.splice(index, 1)
      }
      boom.move()
      boom.draw()
    })
    this.renderContext.drawImage(this.computerCanvas, 0, 0, this.globalWidth, this.globalHeight)
  }
}

const cursorSpecialEffects = new CursorSpecialEffects()
cursorSpecialEffects.init()将以上代码复制到fireworks.js文件中。
(2)修改custom.swig
文件位置themes\next\layout\_custom\custom.swig
添加以下代码:
{% if theme.cursor_effect == "fireworks" %}

{% elseif theme.cursor_effect == "explosion" %}


{% elseif theme.cursor_effect == "love" %}

{% elseif theme.cursor_effect == "text" %}

{% endif %}
如果 custom.swig 文件不存在,需要手动新建并在布局页面themes\next\layout\_layout.swig中 body 末尾引入
{% include '_custom/custom.swig' %}(3)修改主题配置文件
在主题配置文件中添加以下代码,文件位置themes\next\_config.yml
# mouse click effect: fireworks | explosion | love | text
cursor_effect: fireworks
3.打字特效
(1)添加文件activate-power-mode.min.js
文件位置themes\next\source\js\activate-power-mode.min.js
(function webpackUniversalModuleDefinition(root,factory){if(typeof exports==='object'&&typeof module==='object')module.exports=factory();else if(typeof define==='function'&&define.amd)define([],factory);else if(typeof exports==='object')exports["POWERMODE"]=factory();else root["POWERMODE"]=factory()})(this,function(){return(function(modules){var installedModules={};function __webpack_require__(moduleId){if(installedModules[moduleId])return installedModules[moduleId].exports;var module=installedModules[moduleId]={exports:{},id:moduleId,loaded:false};modules[moduleId].call(module.exports,module,module.exports,__webpack_require__);module.loaded=true;return module.exports}__webpack_require__.m=modules;__webpack_require__.c=installedModules;__webpack_require__.p="";return __webpack_require__(0)})([function(module,exports,__webpack_require__){'use strict';var canvas=document.createElement('canvas');canvas.width=window.innerWidth;canvas.height=window.innerHeight;canvas.style.cssText='position:fixed;top:0;left:0;pointer-events:none;z-index:999999';window.addEventListener('resize',function(){canvas.width=window.innerWidth;canvas.height=window.innerHeight});document.body.appendChild(canvas);var context=canvas.getContext('2d');var particles=[];var particlePointer=0;POWERMODE.shake=true;function getRandom(min,max){return Math.random()*(max-min)+min}function getColor(el){if(POWERMODE.colorful){var u=getRandom(0,360);return'hsla('+getRandom(u-10,u+10)+', 100%, '+getRandom(50,80)+'%, '+1+')'}else{return window.getComputedStyle(el).color}}function getCaret(){var el=document.activeElement;var bcr;if(el.tagName==='TEXTAREA'||(el.tagName==='INPUT'&&el.getAttribute('type')==='text')){var offset=__webpack_require__(1)(el,el.selectionStart);bcr=el.getBoundingClientRect();return{x:offset.left+bcr.left,y:offset.top+bcr.top,color:getColor(el)}}var selection=window.getSelection();if(selection.rangeCount){var range=selection.getRangeAt(0);var startNode=range.startContainer;if(startNode.nodeType===document.TEXT_NODE){startNode=startNode.parentNode}bcr=range.getBoundingClientRect();return{x:bcr.left,y:bcr.top,color:getColor(startNode)}}return{x:0,y:0,color:'transparent'}}function createParticle(x,y,color){return{x:x,y:y,alpha:1,color:color,velocity:{x:-1+Math.random()*2,y:-3.5+Math.random()*2}}}function POWERMODE(){{var caret=getCaret();var numParticles=5+Math.round(Math.random()*10);while(numParticles--){particles[particlePointer]=createParticle(caret.x,caret.y,caret.color);particlePointer=(particlePointer+1)%500}}{if(POWERMODE.shake){var intensity=1+2*Math.random();var x=intensity*(Math.random()>0.5?-1:1);var y=intensity*(Math.random()>0.5?-1:1);document.body.style.marginLeft=x+'px';document.body.style.marginTop=y+'px';setTimeout(function(){document.body.style.marginLeft='';document.body.style.marginTop=''},75)}}};POWERMODE.colorful=false;function loop(){requestAnimationFrame(loop);context.clearRect(0,0,canvas.width,canvas.height);for(var i=0;i<particles.length;++i){var particle=particles[i];if(particle.alpha<=0.1)continue;particle.velocity.y+=0.075;particle.x+=particle.velocity.x;particle.y+=particle.velocity.y;particle.alpha*=0.96;context.globalAlpha=particle.alpha;context.fillStyle=particle.color;context.fillRect(Math.round(particle.x-1.5),Math.round(particle.y-1.5),3,3)}}requestAnimationFrame(loop);module.exports=POWERMODE},function(module,exports){(function(){var properties=['direction','boxSizing','width','height','overflowX','overflowY','borderTopWidth','borderRightWidth','borderBottomWidth','borderLeftWidth','borderStyle','paddingTop','paddingRight','paddingBottom','paddingLeft','fontStyle','fontVariant','fontWeight','fontStretch','fontSize','fontSizeAdjust','lineHeight','fontFamily','textAlign','textTransform','textIndent','textDecoration','letterSpacing','wordSpacing','tabSize','MozTabSize'];var isFirefox=window.mozInnerScreenX!=null;function getCaretCoordinates(element,position,options){var debug=options&&options.debug||false;if(debug){var el=document.querySelector('#input-textarea-caret-position-mirror-div');if(el){el.parentNode.removeChild(el)}}var div=document.createElement('div');div.id='input-textarea-caret-position-mirror-div';document.body.appendChild(div);var style=div.style;var computed=window.getComputedStyle?getComputedStyle(element):element.currentStyle;style.whiteSpace='pre-wrap';if(element.nodeName!=='INPUT')style.wordWrap='break-word';style.position='absolute';if(!debug)style.visibility='hidden';properties.forEach(function(prop){style[prop]=computed[prop]});if(isFirefox){if(element.scrollHeight>parseInt(computed.height))style.overflowY='scroll'}else{style.overflow='hidden'}div.textContent=element.value.substring(0,position);if(element.nodeName==='INPUT')div.textContent=div.textContent.replace(/\s/g,"\u00a0");var span=document.createElement('span');span.textContent=element.value.substring(position)||'.';div.appendChild(span);var coordinates={top:span.offsetTop+parseInt(computed['borderTopWidth']),left:span.offsetLeft+parseInt(computed['borderLeftWidth'])};if(debug){span.style.backgroundColor='#aaa'}else{document.body.removeChild(div)}return coordinates}if(typeof module!="undefined"&&typeof module.exports!="undefined"){module.exports=getCaretCoordinates}else{window.getCaretCoordinates=getCaretCoordinates}}())}])});将以上代码复制到activate-power-mode.min.js中。
(2)修改custom.swig
文件位置themes\next\layout\_custom\custom.swig
添加以下代码:
{% if theme.typing_effect %}
{% endif %}如果custom.swig文件不存在,需要手动新建并在布局页面themes\next\layout\_layout.swig中body末尾引入
{% include '_custom/custom.swig' %}(3)修改主题配置文件
在主题配置文件中添加以下代码,文件位置themes\next\_config.yml
# typing effect
typing_effect:
  colorful: true  # 礼花特效
  shake: false  # 震动特效
四、其他
1.Pjax
pjax实现局部页面刷新,做到无刷新加载。
(1)开启pjax
修改主题配置文件中的pjax字段。
文件位置themes/next/_config.yml
pjax: true(2)安装对应的pjax依赖库
$ cd themes/next
$ git clone https://github.com/theme-next/theme-next-pjax source/lib/pjax完成以上修改,pjax就开启了,页面就可以实现无刷新加载了。
五、、参考
本博客的搭建参考了许多大咖们的博文,在这就不一一列举出来了。
还有诸多功能的实现及过程未能展示,若有需要可参考以下大咖们的博客!
老英’s Blog
小丁的个人博客
Leaface
Yearito’s Blog
Sanarous